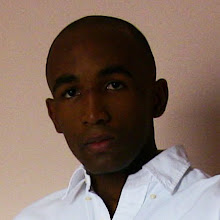
As promised, we'll finish the head modelling today. So last Sunday, we took reference photo of a model, drew topology atop the pictures, created the geometry conforming the drawn topology in the front viewport of 3dsmax. This resulted in a flat surface to which we added volume by moving vertices in a side view (right view for me, it depends which side you drew the topology). That's it for the resume.
Now what we're going to do is end up the modelling and then map and texture the model.
PartII: MODELING (suite)
Now I'm going to close the back and the bottom of the head.
I select the two first edges on top of the head and extrude them in the left viewport to make the shape of the skull.


I realize that it may become knotty because of possible difference of topology. So I undo this and go back to photoshop, to draw the topology before modelling. I set visibility to 0 and grab the viewport (screen capture works as well).

Here's the topology I drew

Ok, I can go for the extrusion thing :-)
Then I continue until I close the back of the head.below is what I get.

Now, I'll deal with the chin

I extrude edges and go so on until I close it.


I'll make the nostrils now. I select the polygon at the center of the bottom side of the nose and bevel it inward twice. I think it's gonna be ok for now.

-->It's time for the ear. The ear is complex, I wonder if I should spare time and use one I made before or stick to the model and go from scratch. Generally, I make the ear in a different file and merge it afterward. It'd need new guides to stick to the model, which means going back to photoshop. I think I'll use a ready ear and make another post especially about modelling an ear.
So I merge an ear. I'll try to put a link at the end of the message to dowload the ear model until I find some time to make the ear tutorial. I add a Xform modifier to and resize and get it to the right position.

I move vertices of the border of the ear to match the topology of the head.

After that I "cut" the model to create a countour for a hole the ear will plug into and delete the polygons.

I make sure there's no texture on the ear; I select it and type in the mini mascript listener the following : $.material=undefined
I attach the ear to the head and weld the backside vertices.

A view from inside, with "backface cull" disabled can be useful.

Before welding the front vertices, I need to insert some more vertices onto edges. Sorry, I went on and forgot to make a picture. The problem with using pre-made parts is that some times, the difference of topologies can force you to add triangles in the mesh. But I prefer having triangles than faces with more than four edges.


I'm done with the ear, let's make now the inside of the mouth. I select the edges except the one that connects to the coner of the mouth (I don't want the corner vertice to be modified) and make a "chamfer" with 2 segments, to have mater to work.


I select the vertices of the middle loop, except the 2 last. I move them inward.

I select the edges and make a "connect". I move those new vertices/edges to get a shape. I won't add extra details, but I could fine tune the shape by adding at least two more loops.


Now, it's time to have a proper symmetry plane. I go to "border subObject" mode select the boder, toggle to "edge subObject" (max keeps the selection). With "Alt" pressed I get rid of the neck edges. I convert my selection to vertice (Ctrl+click on the icon). In the front viewport, I align the vertices along X axis with "make planar".


I zoom in to have a look at the position of the pivot compared to the symmetry plane. I turn to "affect pivot only" and move the pivot to align it with the model's symmetry plane.

I activate my symmetry modifier. It looks ok.

______
Bonus: I organize my scene with the layer manager, so I can hide/unhide objects easily. Especially, the planes for the reference images are in separated layers. I also use the "Fetch" command from time to times sothat I can retrieve a previous valid state if needed. I use to keep copies of the model at differents stages of modelling in a layer that I call "safe".
PART III: MAPPING - TEXTURING
I apply a "uvwUnwarp" modifier above "symmetry".
I begin by separating the ears by applying a planar map to them while their faces are selected. I remove the nostril and the inner mouth too. I can then cylindricaly map the head. I turn the mapping gizmo sothat the green line lays behind the head (this is where the uvs will be sliced). There is a line of polygons behind that are not well mapped.

I select them and apply a planar map with the "align Y" option. the I open the Edit window and weld the UVs to the corresponding part of the main head (corresponding vertice highlight in blue).

Now I try to unstrech some parts, like under the chin and around the nose. I resize the separated elements and make a place for them.


Usually I would collapse the stack, delete half of the face, apply a new symmetry modifier and miror and weld the UVs of the symmetrized geometry to keep my UV perfectly symmetrical. But I won't go through that pain today ;)
So I'm ready to make the textures. I Use the tool menu to render the UVW template. I'll use the reference photo to make my textures so I use a size according to the photo.

I minimize 3dsmax and go under photoshop. I begin by selecting parts of my front image, making new layers from them and then matching them to my uvw template.

I take the face without its features and place it under my template. NB: the uvw template (background) have been changed to a standard layer (2-click) and placed on top of the drawing layer with the blending mode "lighten".

I do the same with the side. I use the clone stamp tool to begin to draw.

I want to select a base color; I choose a good area on the skin and pick my color. It will be #654026.

I delete the right part and use symetry to get it.

I forgot to delete the ear. I deal with this quickly.

Ok, I save the photoshop file and a jpg, because psd can be big and I don't want to load it into max. I want to have a look at it so far. Back into max, I create a material with the jpg as bitmap.

Ok, I go back to photoshop to deal with the cutted parts, begining with the ear.

It seems a bit too dark. In stead of modifying the map, I'll try to fix it within 3dsmax.

I go at the bitmap level on the material editor, under "output" and change some parameters. I enable "Clamp" and put RGB offset to 0,11; I also enable color map where I stay in mono and move the second point a little bit upward.

The head appears thin because I meshSmoothed it, so it would need some tweakings to match again with the model.
Ok, we'll end this here.
Hope it was useful.
Cheers!
P.S: the file for the ear: