Hello!
I'm trying to recreate something like the deamon smoke effect in supernatural. It's seems quite simple, but I won't count the chickens before they hatch.
I began by recording my video; no chance I forgot about calibration, therefore it will be more difficult to retrieve the settings (position, FOV, etc) of my camera (too bad). I'm lazy today, so I won't make a new record (:D) and hope to be able to approximate camera parameters later. Hope it won't be too much a headache. I don't know why, but I can't load the video today, my internet connection stops during loading everytime I try. I'll try tomorrow.
Then I go under 3dsmax and create a Super Spray particle system with the following settings:

Basic parameter->particle formation->spread : 26
Particle generation->particle quantity: 30
->life, emit and stop: 200
Particle type->particle type: standard
->standard particle: facing
The next thing is to create a path the particles will follow. I go ahead and create it in the top view then modify the vertices to have a credible path. I turn all the vertices of the spline to smooth.

Now I create a Path Follow Space Warp. With the space warp selected, under the modify panel, I pick my path and conform the settings to those of the Super Spray.

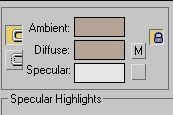
Let's create a material now. I Open the material editor, rename a slot to "demon_mat" and put a gradient map to the opacity channel.

In the gradient map parameters, I assign a a noise map to the second color and put the gradient type top "radial".

I set the noise size to 20 (My unit is "meters" with "1unit=1centimeter"). I go back to the gradient map parameters and drag and drop the noise map to the third channel with the "instance" option.

I want color variations, so I add a noise map to the diffuse channel as well, set size to 5 and change color 1 and 2 to have a dirty looking smoke ;D


I add a spot light to the scene; this light will deserve testing. Maybe later I'll create a better lighting set up.
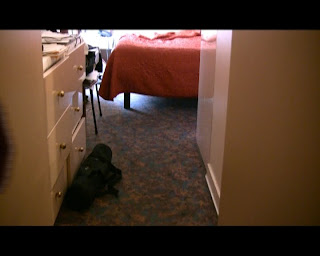
I cut my video so I can have an idea of what it will look like after the final composition. It shows 6 points of view I export a picture for each view, intended to the camera matching. For the last two views I export still images sequences.

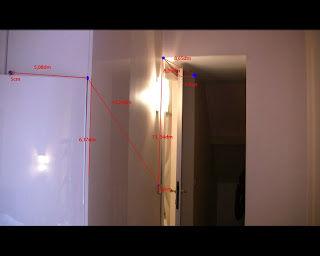
So it's time for this very camera matching. Huh... oups! I forgot to make measurements of features on the recording place. Let's go and do it now. I need 5 points on each picture; I choose five distinctives points on the first view. Note that there's another technique that consist of making 3D models which match features in the picture.

So I made the measurements and then help myself with the tape helper to position the points.

I use the camera match utility to match cam points to pixel in the picture. Amazing, I get the thing! But what an idiot, I made the matching with a view which don't need it because we don't see the smoke in it (loud of laughing). Doesn't matter, I do the same thing with the other views, but only those where the cloud will be seen.
 the crosses are the camPoints.
I get my matched cam in separated files. Now I'm ready to set up the rendering scenes. But first I want to have a little panache for my cloud of smoke. So I opened the file of the smoke and animate the colors of the noise map in the diffuse channel (turn auto-key on and change the color). I stay careful about not having too big variations of hue/saturation between the colors.


I go back to the file containing the first point of view. I merge everything from the file of the smoke except the spotlight. I create two spolights (finally I could have merged the light as well :D) and position the merged object in the scene.

I use a matte/shadow material on a box as ground to receive shadow.

For some views, I need some parts of the backgound to be opaque, like the closet's door below.

I create a geometry (box) and align it's edges with the door.

I use "matte/shadow" material as well but with opaque alpha option. For my matte objects, I turn "cast shadow" off in the object properties dialog.

Note: the reason I didn't make a large cloud is for render time optimisation purpose. I didn't use ray-traced shadow combined with the shadow map (which would give better results and a nice looking cloud) for the same reason.
I used ram player (rendering menu) to create an ifl file that I use as background for the two last views, for which I used still images sequences.
In the last two views, I animate the vertices of the path (spline) to match with the head's movements.

For the last view, I did a meticulous works of masking with an extruded closed spline which vertices I keyframed. The extruded spline has a matte/shadow material with "opaque" option turned on.

The remaining step is the montage.
I forgot to mention that I rendered tga sequences.
Thanks for reading. You can see the video here.
Cheers!

No comments:
Post a Comment